
Add Icon Map Slicer to a report
Icon Map Slicer is a Power BI custom visual. You add it to a report from Microsoft AppSource, or import it from a file, and then place it on a report page like any other visual.
Get the visual
From AppSource
- Open your report in Power BI Desktop or in the Power BI service (in edit mode).
- In the Visualizations pane, select the ... button under the visual icons, then Get more visuals.
- Search for Icon Map Slicer and select Add.
The Icon Map Slicer icon appears in the Visualizations pane for that report.
From a file
If your organization does not use AppSource, or you want a specific version, import the visual from a .pbiviz file:
- Download the file for the version you want from the Release notes.
- In the Visualizations pane, select ..., then Import a visual from a file, and choose the file.
An imported visual belongs to the report it was imported into. Import it again in each report that needs it, or ask your Power BI administrator to add it to your organization's visuals.
Try a version before it reaches AppSource
When a report can get Icon Map Slicer from AppSource, Power BI uses the AppSource version, even if you imported a newer file. To test a newer file in Power BI Desktop, open File > Options and settings > Options, and under Current file > Report settings turn on "Override the available AppSource visual's version for this session, so you can upload and test a visual file". Then import the file. You may need to move to another report page and back before the map uses the new version.
Add it to a report page
- Select the Icon Map Slicer icon in the Visualizations pane. An empty visual appears on the page.
- Resize it. Maps work best with room to breathe.
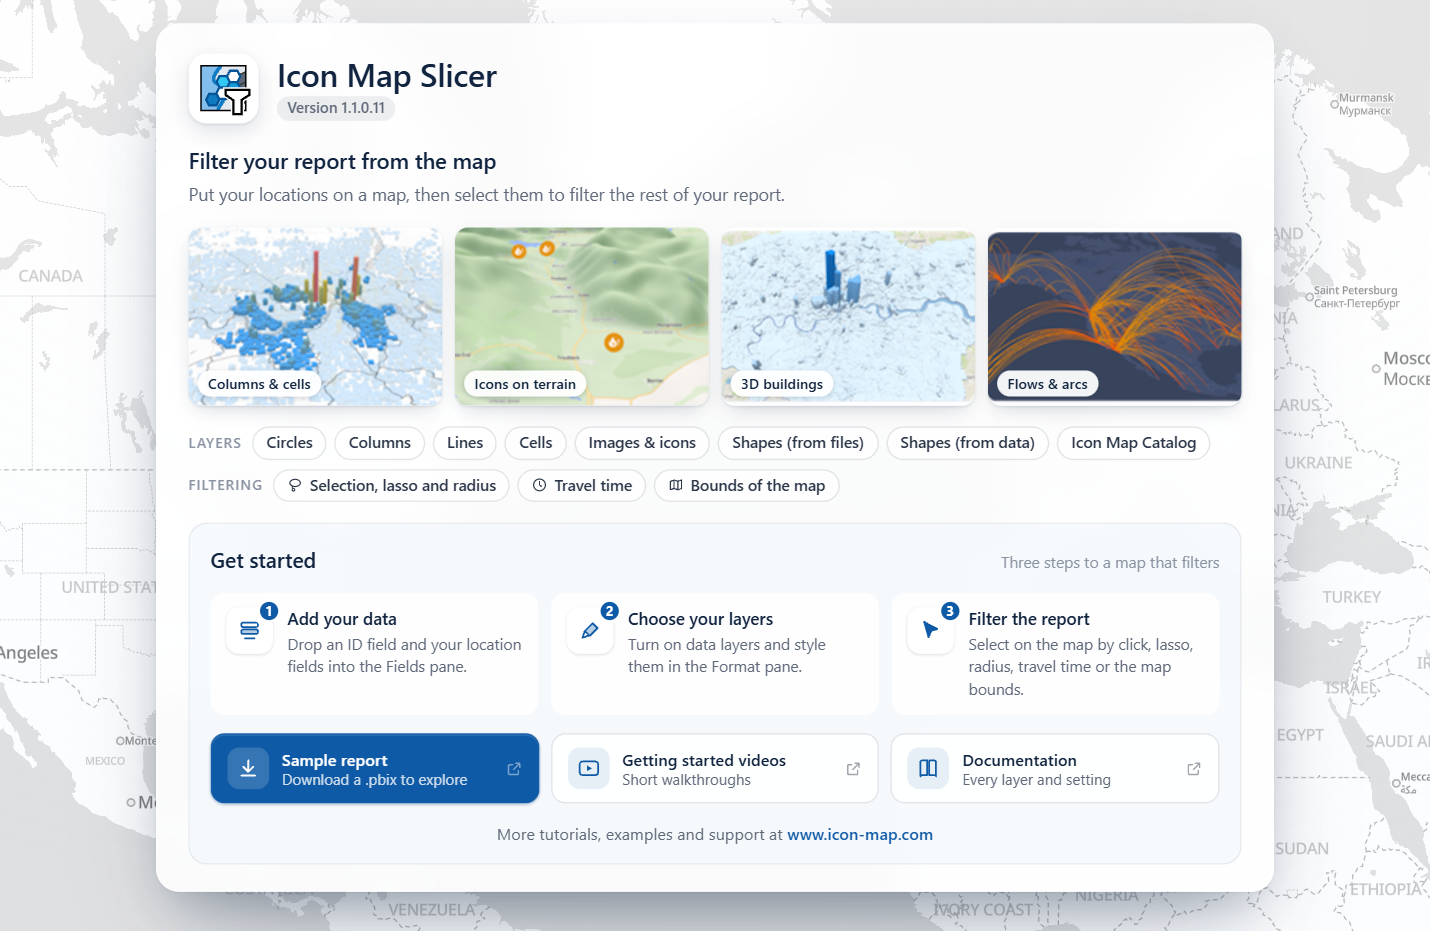
With no fields, the visual shows a start page over a slowly moving map. The page shows:
- The version number, under the name.
- The headline "Filter your report from the map".
- Four example maps, when the visual is large enough to fit them.
- Links to the documentation, in two rows: Layers (Circles, Columns, Lines, Cells, Images & icons, Shapes (from files), Shapes (from data) and Icon Map Catalog) and Filtering (Selection, lasso and radius, Travel time and Bounds of the map).
- A Get started panel with three steps to a map that filters: Add your data, Choose your layers and Filter the report.
- A Sample report button, which downloads a Power BI file to explore, and buttons for Getting started videos and this Documentation.
On a small visual, the start page leaves out sections from the top down so that the rest still fits.
The start page goes away when you add the first field. To build a map from here, follow Build your first map.
Check the version
The version is shown on the start page. Once the visual has data, it is also the first line of Format pane > Icon Map Slicer.
When a new version is submitted to Microsoft, AppSource lists the new number before the visual can be downloaded, so the version listed in AppSource can differ from the one in your report. Check the Format pane when you need to be sure. Your reports use the newest version that AppSource provides.
License the visual
Icon Map Slicer needs a license. Until it finds one, a panel covers the map and offers ways to get one. While you edit a report, it offers the Get FREE Developer License button, a box for a license key with an Apply Key button, and links to buy a license and to contact Icon Map support.
The visual looks for a license in this order:
| License | How it works |
|---|---|
| A user license from AppSource | Bought and assigned through Microsoft. The visual finds it from your Power BI sign-in, and there is nothing to enter. |
| A license key | Entered in the report, in Format pane > Icon Map Slicer > License Key (for non-user based licensing), or in the box on the license panel followed by Apply Key. Needed where Power BI cannot provide user licenses, such as Power BI Embedded, Publish to web and Power BI Report Server. |
If you are trying the visual out, select Get FREE Developer License on the license panel. The developer license is free for up to 6 months, covers both Icon Map Slicer and Icon Map Pro, and works in Power BI Desktop and when you edit reports in the Power BI service. It does not cover reading view in the service, so readers of a published report need a full license or a publish trial.
The full Icon Map Slicer card of the Format pane appears once the visual has at least one field. Add a field first, then paste your key there or in the box on the license panel.
For the details, see:
What you need
- A recent version of Power BI Desktop, or the Power BI service.
- A browser or machine with WebGL 2 available. Without it, the visual shows "WebGL 2 is not available in this environment." and cannot draw a map. See Supported environments and limits.
- Network access to the services the map uses, such as basemap tiles. For restricted networks, see Power BI Report Server (on-premises) and Troubleshooting.