
Layer Management
The Catalog layers screen is the first thing you see when you open the catalog from the Format pane. It lists everything on your map, top to bottom, and is where you reorder, edit and remove catalog layers.
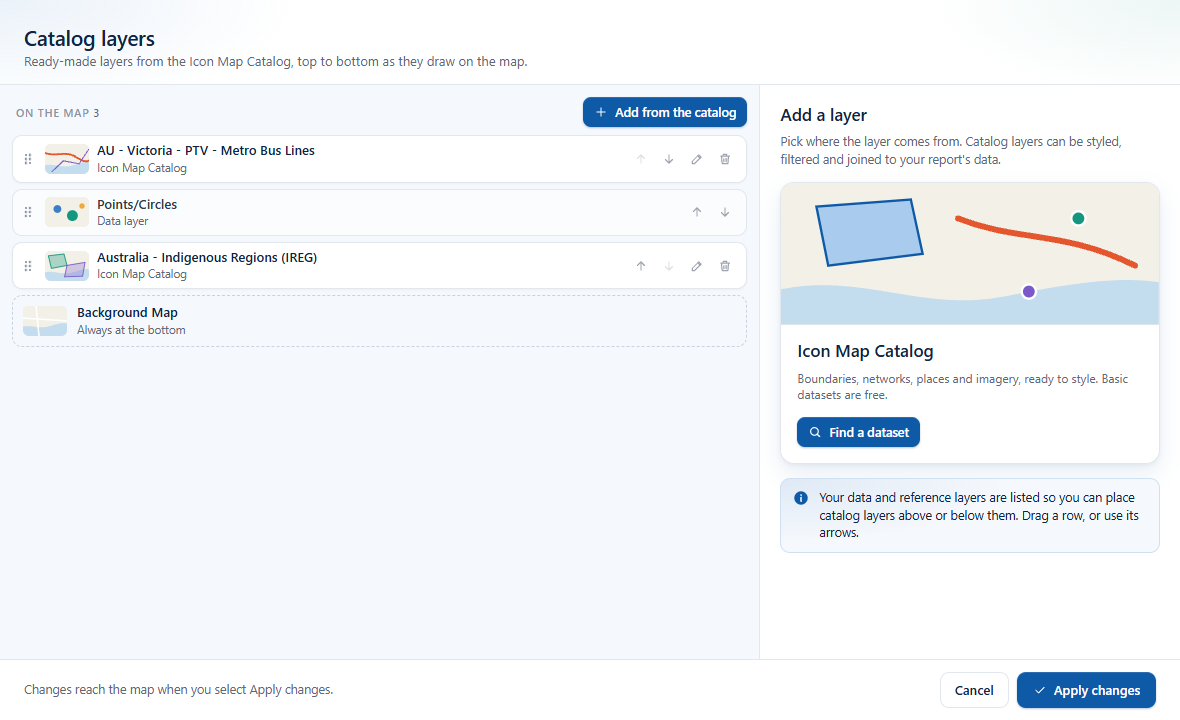
The list
Each catalog layer shows its name and a picture of its geometry, with buttons to move it up or down, Edit it (the pencil) and Remove it (the bin).
Your data layers and reference layers are listed too, marked Data layer or Reference layer, so you can place catalog layers above or below them. You can move them, but you edit them where they were added. Background Map is always at the bottom.
Reordering
Layers higher in the list draw on top. To move a layer:
- Drag it by its handle to a new place in the list, or
- use its up and down arrows, or
- select the row and press Alt + Up or Alt + Down.
For example, put a rail network above a boundary layer so the lines show over the filled areas.
Editing a layer
Select Edit (the pencil) to open the Edit layer screen. It works like Configure layer: the preview map on the left, the settings on the right. Change anything, then select Update layer, or Cancel to leave it as it was.
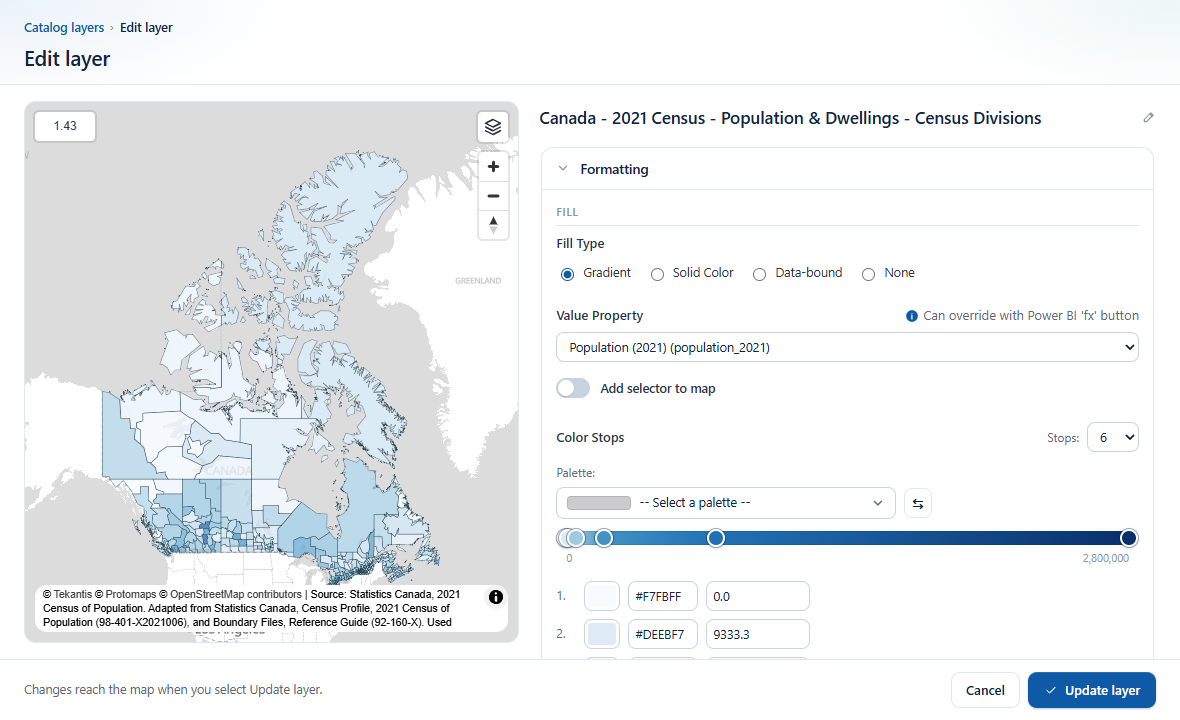
In Icon Map Pro and Icon Map Slicer, the Layer Manager opens the same screen: select a catalog layer there and choose Configure layer. When you select Update layer or Cancel, the Layer Manager comes back.
Removing a layer
Select Remove (the bin). The layer leaves the list straight away, and leaves your map when you apply your changes.
Layer limit
You can add up to 20 catalog layers to a visual. When you reach the limit, the catalog says so; remove a layer to add another.
Applying your changes
Select Apply changes to close the catalog and save everything. Each layer's settings are saved in the report, so they travel with your PBIX file.
Nothing reaches the map until you apply: Cancel (or the dialog's close button) closes the catalog without changes.